
3 Bids and 15–20% Contingency: Home Renovation Budget for Homeowners
- Monarch

- 2 days ago
- 10 min read

Start with a written scope, get three itemized bids, and set aside a 15% to 20% contingency. That’s the practical formula behind a home renovation budget that holds up once the walls come open. Every dollar should sit in one of four buckets: hard costs, soft costs, contingency, and fixtures or furnishings. Write the scope first, price it three ways, and protect a reserve before you touch a single wall.
TL;DR:
A detailed scope, three itemized bids, and a contingency of 15% to 20% form the core of a reliable renovation budget, protecting against unexpected costs.
Renovation costs vary significantly by scope, region, home age, and finish level, with full remodels often costing much more than simple cosmetic updates.
Line-item tracking across hard costs, soft costs, fixtures, and contingency helps maintain budget control and identify overruns early.
Bidding should be based on a common scope, with at least three contractors providing detailed, itemized quotes to reflect true market value.
A contingency buffer of 10% to 30% is recommended, especially for older homes or large projects, and should be kept separate from upgrade budgets and tracked carefully.
Table of Contents
How Much Do Renovations Actually Cost?
National ranges only mean something once you know where your project sits inside them. A cosmetic refresh, a mid-range remodel, and a full gut renovation are three different financial animals, and lumping them together is why so many homeowners walk into a project underfunded.
Median renovation spending across the country tends to land in the mid-five-figure range, though the breakdown varies enormously by scope. A refreshed powder room and a whole-house addition both count as “renovations” on paper, but they belong nowhere near the same budget line.
Room-by-room, the spread looks roughly like this:
Kitchen: cosmetic updates (paint, hardware, countertops) run modest; full remodels with cabinetry, layout changes, and premium appliances climb sharply higher. Fidelity’s planning guide uses room-by-room sample costs like these to help homeowners calibrate expectations before they call a contractor.
Bathroom: a simple swap of fixtures and finishes costs far less than a full reconfiguration involving plumbing moves or a curbless shower.
Basement: unfinished-to-finished conversions vary based on whether you’re adding a bathroom, egress windows, or moisture remediation, all of which push costs up fast.
Whole-home renovation: touching every room at once multiplies both labor and soft costs, and rarely finishes on the first estimate alone.
Additions: new square footage costs more per square foot than remodeling existing space, because you’re paying for foundation, framing, roofing, and utilities from scratch.
Per-square-foot benchmarks give you a second lens. Cosmetic work (paint, flooring, fixtures) sits at the low end of the per-square-foot band. Mid-range remodels, where you’re replacing cabinetry, countertops, and some structural elements, land in the middle. Full remodels involving layout changes, electrical, and plumbing rework sit at the top.
A widely cited planning heuristic caps renovation spending at around 30% of your home’s current value, a benchmark Fidelity uses to keep homeowners from over-improving relative to their neighborhood.
Three factors widen these ranges more than anything else: region (labor costs in coastal metros can run double what they are in the Midwest), home age (pre-1980 homes almost always carry hidden system and structural costs), and finish level (stock cabinetry versus custom millwork can shift a kitchen budget by tens of thousands of dollars on its own). Before you request a single bid, decide honestly which finish tier you’re targeting. That decision drives everything downstream.
Build Your Renovation Budget: Line Items and a Spreadsheet Blueprint
A budget only protects you if it captures every category of spending, not just the obvious ones. Homeowners who blow their numbers almost always missed a category entirely, not just underestimated one they already knew about.
Four categories belong in every renovation budget:
Hard costs. Labor and materials, the physical work of construction. This is usually the largest single bucket, and the one most homeowners plan for first.
Soft costs. Permits, design fees, engineering, debris removal, and often temporary housing if the project makes part of your home unlivable. PNC’s budgeting guide flags permits and debris removal specifically as soft costs that homeowners chronically underestimate.
Fixtures and furnishings. Appliances, light fixtures, hardware, window treatments, and furniture for renovated spaces. These are easy to treat as an afterthought, and that’s exactly why they blow budgets late in a project.
Contingency. A dedicated reserve for the unforeseen, tracked separately from your other three categories so you always know what’s driving overruns.
Once you have the categories, build the tracking tool. A simple five-column spreadsheet does the job better than any app: Category, Estimate, Actual, Variance, and Notes. Every line item, from demolition to cabinet hardware, gets its own row. The variance column is where the budget earns its keep. It shows you in real time whether you’re trending over or under, room by room, so you can course-correct before the money’s gone.
Pro Tip: Lock your material selections and pricing before demolition starts. Locking prices before the walls open removes one of the biggest sources of mid-project cost creep, because you’re no longer shopping under time pressure once the crew is already on-site.
On typical splits, PNC’s guidance points to labor and materials making up the bulk of a project, with soft costs and contingency layered on top. Knowing that rough split in advance helps you sanity-check a contractor’s quote. If materials seem unusually low relative to labor, or soft costs are absent entirely, that’s worth a direct question before you sign anything.
How Do You Get and Compare Contractor Bids?
Comparable bids start with a document, not a phone call. Write a detailed scope of work covering every material, finish, and task, and hand the identical document to every contractor you ask to bid. If each contractor is estimating against a different mental picture of the project, you’re not comparing prices, you’re comparing guesses.
Several habits separate a useful bid from a risky one:
Require itemized quotes by trade, so you can see labor, materials, and markup for plumbing, electrical, carpentry, and finishes separately rather than as one lump sum.
Ask for specific SKUs or product lines wherever the scope calls for fixtures or appliances, so you’re comparing the same countertop or the same faucet across bids, not a placeholder allowance.
Verify licenses and insurance directly with the issuing body rather than taking a contractor’s word for it, and check recent references on projects of similar size, a step the FTC’s consumer protection guidance recommends before signing any home improvement contract.
Collect at least three bids. Two bids only tell you one is higher; three start to show you a real market range.
Bid spreads of 30% to 50% between contractors on the same scope are common, and that’s not necessarily a red flag on the low or the high end. It usually reflects differences in overhead, crew experience, or how conservatively each contractor is pricing risk. What matters more is whether each bid was built against your written scope. A detailed scope shared with every bidder is the single most effective defense against scope creep and mismatched pricing once work begins. If a bid comes in dramatically lower than the other two, that’s often the moment to ask harder questions, not celebrate a deal.
Contingency and Hidden Costs: How Much Buffer Should You Hold?
Hidden costs aren’t really hidden flags on inspection. They’re predictable categories that most budgets simply fail to plan for. Mold and asbestos remediation, electrical or plumbing systems that turn out to be out of code, structural repairs discovered once drywall comes down, permit fees that escalate mid-project, and temporary housing if your home becomes unlivable all show up often enough that they belong in your plan from day one, not as a surprise.
Contingency by project type: cosmetic work, 10 to 15%. Kitchen or bathroom remodels, 15 to 20%. Full-house renovations, 20 to 25%. Homes built before roughly 1980, 25 to 30%, given the likelihood of outdated systems behind the walls.
Renovation guides consistently recommend holding a 10 to 20% cushion to absorb surprises like hidden water damage or permit delays, and that guidance climbs toward the higher end for projects involving demolition in older housing stock. PNC’s own methodology lands on roughly 15% as a workable default for many mid-size projects.
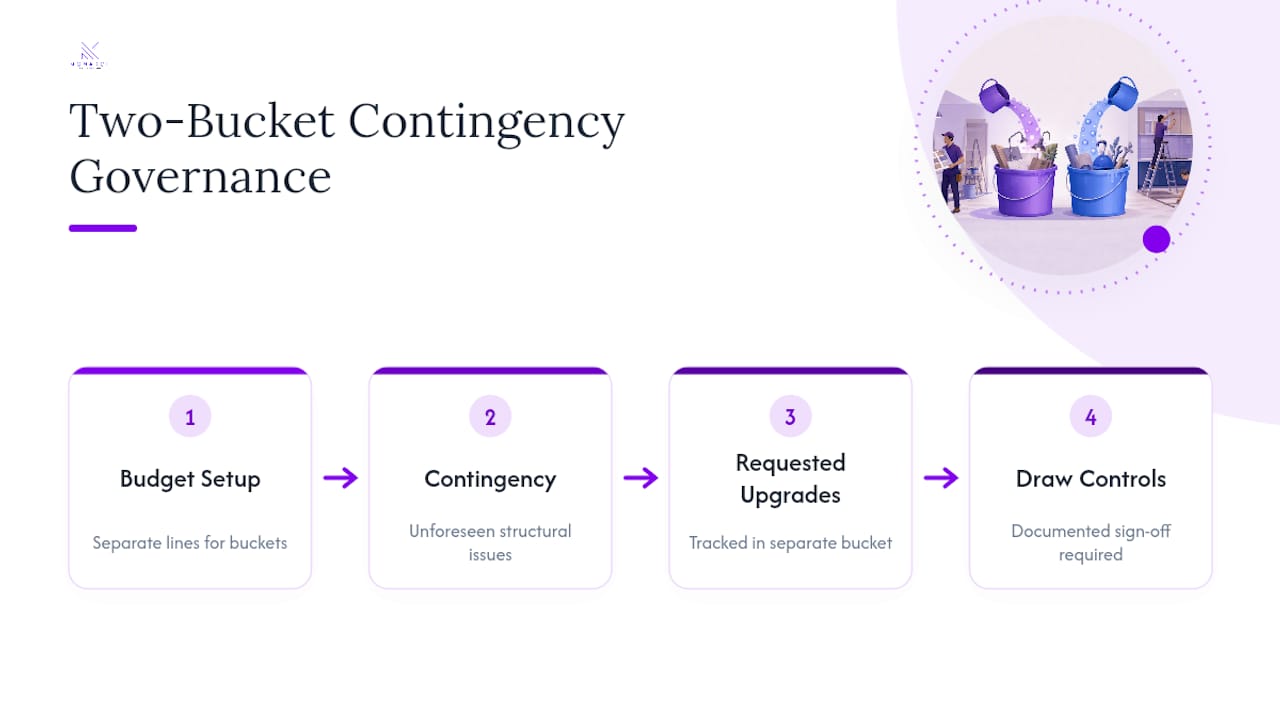
Governance matters as much as the percentage. Keep contingency in a separate line from any “while we’re at it” upgrades you decide to add mid-project. Track contingency draws only against genuinely unforeseen issues, structural problems or failed systems discovered after demolition, and track requested upgrades in their own bucket entirely. That separation is what lets you look back at the end of a project and actually explain where the overrun came from, instead of shrugging and calling it all “surprises.” Require a documented sign-off before any contingency draw, even a small one. Verbal approval on a job site is how a 15% reserve quietly becomes a 40% overrun.
Financing and Payment Strategy: Paying Without Overexposure
Financing choice should match project size and how much risk you’re comfortable carrying. Cash is cheapest for smaller projects because it carries no interest, but it removes your liquidity cushion right when a project might need one most. A home equity line of credit fits mid-size to large projects well, since you draw only what you spend, though rates float with the market. A home equity loan gives you a fixed rate and predictable payments, useful for a defined-scope project where you already know the total. Personal loans work for smaller renovations when you don’t want to touch home equity at all, usually at a higher rate than secured options. Credit cards should stay reserved for small purchases you can pay off fast. Carrying renovation debt on a card past one billing cycle gets expensive quickly.
Whatever financing you choose, protect yourself with a payment schedule tied to milestones, not dates on a calendar:
Deposit at signing: modest, often around 10%, to secure your slot on the contractor’s schedule.
Draw at material delivery or demolition start: confirms real progress before you release meaningful funds.
Mid-project draw at rough-in completion: electrical, plumbing, and framing inspected and passed.
Near-final draw at substantial completion: most finishes installed, punch list forming.
Final payment held until punch list is fully resolved: your leverage to make sure small fixes actually happen.
If your project includes qualifying upgrades like insulation, windows, or high-efficiency HVAC, check IRS guidance on energy-efficient home improvement credits before you finalize material selections. Some upgrades that cost slightly more upfront pay part of that back at tax time.
Keeping the Project on Track: Weekly Reviews and Change Orders
Budgets don’t fail all at once. They erode through small, unreviewed decisions made in the middle of a busy week, which is exactly why a weekly check-in matters more than any spreadsheet formula.
Hold a weekly budget-versus-actual review with your contractor or project manager, comparing every line item’s estimate to what’s actually been spent or committed so far.
Put every change in writing before it happens, not after. A change order should state the exact scope change, the price impact, and the schedule impact, signed by both parties before work starts.
Treat verbal approvals as a trap, not a shortcut. “Sure, go ahead” on a job site has no price attached to it until the invoice arrives, and by then you have no leverage to negotiate.
Approve alternatives before demolition, not during it. Once a wall is open, you’re making decisions under pressure with limited options, which is when the most expensive mistakes get approved just to keep the crew moving.
Pro Tip: Phase larger projects where possible, and hold back a portion of each payment until the phase passes inspection. Phasing gives you natural checkpoints to catch common regrets before they compound into a full-project problem.
How Monarch Carpenters Design Studio Keeps Projects on Budget
We built Monarch carpenters around a simple belief: cost discipline and design quality aren’t opposing goals. Our design-build model puts designers and carpenters in the same room from day one, so scope gets defined once, priced once, and built without the disconnect that happens when design and construction sit under separate roofs.
That collaborative structure is a large part of why homeowners consistently leave us reviews praising both the finished design and how manageable the cost stayed throughout. We’d point you to specific client outcomes and testimonials here, and we’re gathering the strongest of those stories for this space now. What we can say plainly is this: our carpentry cost breakdowns are itemized by design, because a homeowner who understands the “why” behind a price rarely feels blindsided by the “how much.”

The One Habit That Actually Prevents Overruns
If you take one thing from this guide, make it this: write the scope before you call anyone. Every overrun I’ve seen traced back to a scope that stayed fuzzy past the bidding stage, not to a contractor who lied about a price. On a Monarch project, the moments where a homeowner felt genuinely calm mid-renovation were always the ones where the scope had been nailed down and priced against three bids before a single wall came open.
The next step is simple. Write your scope this week. Request three itemized bids. Set your contingency before you sign anything.
— Seth Wayne
Get a Modest-Cost Renovation Without the Budget Anxiety
Most of the budgeting rigor above still leaves you doing the hardest part alone: coordinating designers, carpenters, and trades so the numbers you wrote on paper actually hold up on-site. Monarch carpenters removes that gap. As a design-build studio, we keep designers and in-house carpenters working from one scope and one price from day one, so there’s no handoff where costs quietly drift.

Homeowners consistently tell us the same thing in their reviews: elegant results at a cost that didn’t require sacrificing the design they actually wanted. That combination, strong design feedback paired with modest, well-managed costs, is the outcome this entire budgeting process is built to protect. If you’re ready to turn your written scope into itemized bids and a project plan that respects your number, book a consultation with Monarch carpenters and let our team price your project against your actual scope, not a guess.
Sources
FAQ
What is the 30% rule in remodeling?
It’s a planning heuristic suggesting you cap total renovation spending at around 30% of your home’s current value, a benchmark Fidelity uses to keep upgrades in line with neighborhood value.
Is $100,000 enough to renovate a house?
It depends entirely on scope and home age. That figure comfortably covers a full kitchen remodel or a bathroom-plus-basement project, but it can fall short of a whole-home renovation once soft costs and a 20% to 25% contingency are factored in.
What is a good budget for renovating my home?
A good budget starts with your written scope priced against three itemized bids, then adds a contingency of 10 to 30% depending on project type and home age, rather than starting from a single national average.
Is $30,000 enough for a kitchen remodel?
It can cover a cosmetic-to-mid-range kitchen update, cabinetry refacing, countertops, and appliances, but a full gut renovation with layout changes and custom cabinetry typically runs well above that figure.
Recommended
Comments