
Condo Living Area Design: Smart, Stylish Small-Space Plans

TL;DR:
Choosing furniture based on usable wall length ensures a balanced condo living area. Layering lighting and using vertical storage expand perceived space without structural changes. Proper measurement, layout planning, and in-house carpentry optimize design, cost, and functionality for small spaces.
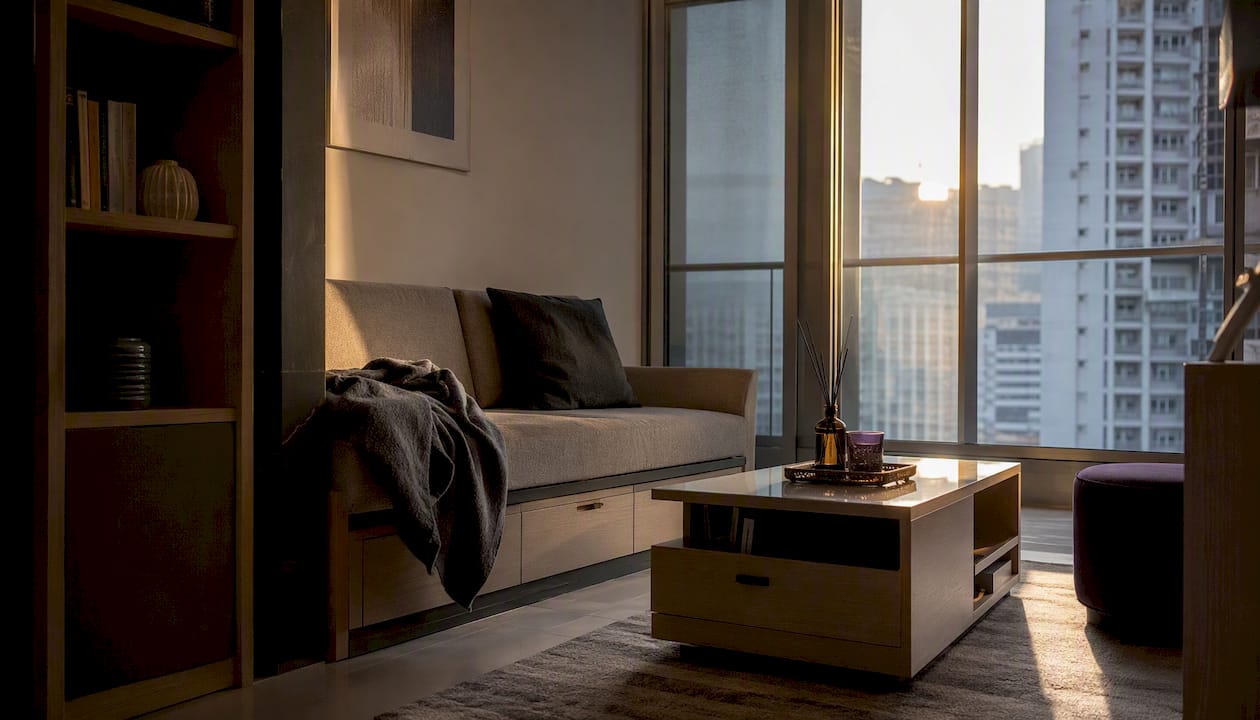
A well-designed condo living area balances scale, layered lighting, and vertical storage to feel bigger, cozier, and more functional. The single most important move is choosing furniture sized to your usable wall length, not the room’s total square footage. Everything else follows from that decision.
Three highest-impact moves to act on now:
Scale your sofa to the usable wall, zone with a large area rug, and keep all front legs of your seating group on it.
Layer three types of lighting (ambient, task, accent) to define zones without building walls.
Go vertical with storage: floor-to-ceiling shelving and built-in cabinetry recover floor space and add perceived height.
Do this in 15 minutes: Grab a tape measure and mark your sofa’s footprint on the floor with painter’s tape. You will immediately see whether your planned piece fits or crowds the room.
Table of Contents
How to assess your condo living area before you buy anything
Choosing and placing furniture for scale, delivery, and modularity in condos
Storage strategies that keep condos tidy without eating floor space
Color, finishes, and material continuity that make small open spaces read larger
Realistic budget ranges and timeline differences for a condo living area update
Moodboard prompts and before/after micro-case studies you can copy
Designer perspective and Monarch carpenters’ practical carpentry fixes for condos
What professionals actually prioritize in condo living area design
Monarch carpenters brings bespoke design-build to your condo living area
How to assess your condo living area before you buy anything
Start with measurements, not Pinterest boards. Measure the usable rectangle of your living area, the swing arc of any balcony slider door, the location of structural columns, and the width of your service elevator door. That last number determines what furniture can actually be delivered. Megafurniture’s furnishing guide maps sofa widths to usable wall lengths and provides sofa-to-coffee-table clearance norms, which is a practical starting point for any condo.
Log your natural light by noting which walls receive direct sun at 9 AM, noon, and 4 PM. Identify your dominant sightline: is it the view, the TV wall, or the kitchen? That sightline determines where your primary seating faces. Also document your building’s HOA or management constraints, including rules on drilling into post-tension slabs, permitted anchor depths, and any restrictions on modifying electrical circuits.
Measurement checklist:
Usable wall length (subtract door and window frames)
Balcony slider swing arc
Column and beam locations
Service elevator interior width and depth
Ceiling height at lowest point (beams, soffits)
Existing electrical outlet and light switch positions
Pro Tip: Tape out your sofa’s full footprint AND your rug’s outline on the floor before ordering either piece. Walk the clearance paths. If you cannot comfortably pass between the sofa and the coffee table, the sofa is too large or the table too wide.
Choosing and placing furniture for scale, delivery, and modularity in condos
Furniture scale is the single variable that most condos get wrong. A sofa that fills 75–80% of the usable wall length reads as intentional; one that fills 95% reads as crammed. Condo living room design guidance from Pure Equity Realty consistently identifies right-sized furniture, light color palettes, and multipurpose pieces as the moves that make small spaces feel larger.
Measure the usable wall first. Subtract any door swings, columns, or fixed cabinetry before deciding on sofa width.
Sectionals vs. modular sofas vs. sofa-plus-chairs. Sectionals maximize seating but are difficult to reconfigure and often cannot fit into a standard condo elevator in one piece. Modular sofas solve both problems: individual modules fit through elevator doors and can be rearranged as your needs change. A sofa-plus-two-chairs arrangement offers the most flexibility and the easiest delivery.
Plan the delivery route before you purchase. Measure the elevator interior, the corridor width, and any 90-degree turns between the elevator and your front door. A piece that fits the room but cannot navigate the building is a costly mistake.
Clearance guidelines. Leave 16–18 inches between the sofa and coffee table for comfortable use. For TV viewing distance, a general rule is 1.5 to 2.5 times the screen’s diagonal measurement.
Storage strategies that keep condos tidy without eating floor space
The fastest way to make a condo living area feel larger is to remove visual clutter from eye level. Vertical shelving and floor-to-ceiling bookcases draw the eye upward, add perceived height, and recover storage without consuming floor area. High-mounted ledges above doorways and windows use otherwise dead space for books, baskets, or decorative objects.
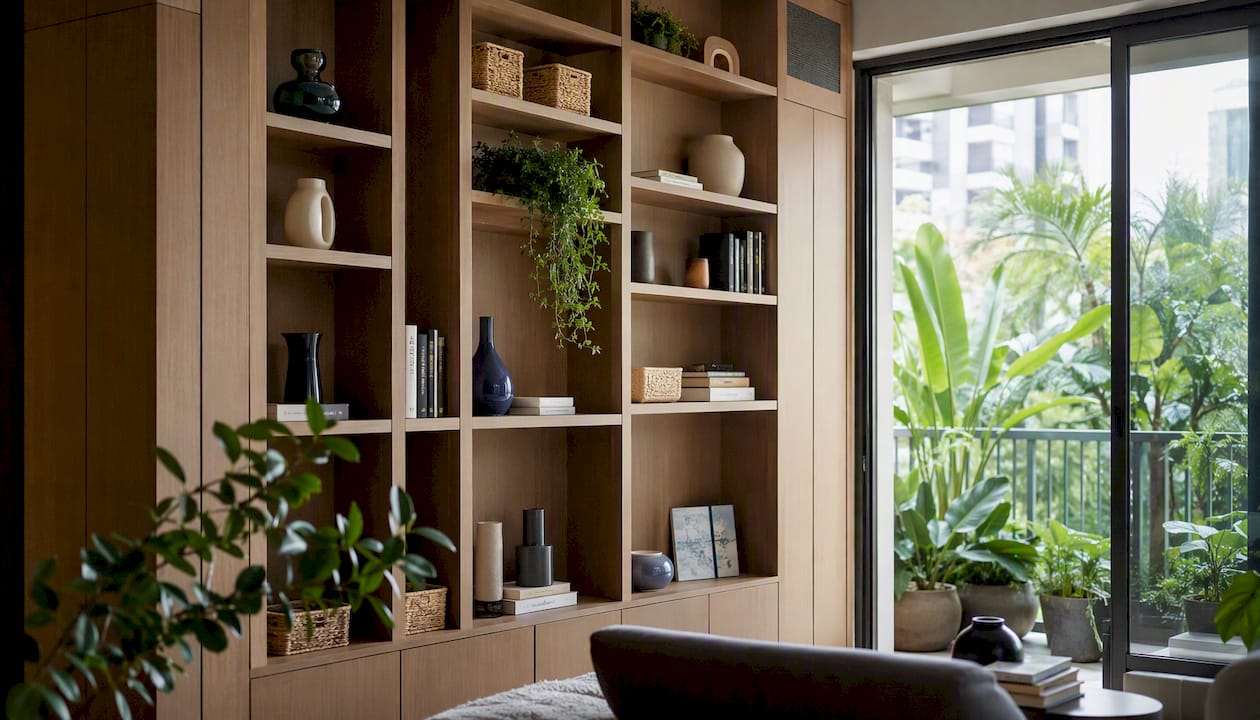
Hidden storage does the heavy lifting for everyday items. Storage ottomans replace coffee tables and hold blankets, remotes, and cables. Lift-top coffee tables provide a work surface and concealed storage in the same footprint. Built-in benches along a window wall or entry zone combine seating with deep drawers below.
Custom built-ins versus modular furniture is a genuine trade-off. Modular pieces are faster to source, easier to reconfigure, and HOA-friendly because they require no drilling into structural elements. Custom built-ins, on the other hand, use every centimeter of an irregular wall, look intentional rather than assembled, and add measurable resale value. Lead times for custom carpentry typically run four to eight weeks, so plan accordingly. Monarch carpenters’ approach to custom millwork addresses exactly this trade-off for residential clients.
Pro Tip: Before commissioning built-ins, photograph the wall at the same time of day for three consecutive days. Note where shadows fall and where the light is flattest. Built-in shelving placed in a shadow zone will look dark and heavy; placed in a lit zone, it becomes a feature.
Color, finishes, and material continuity that make small open spaces read larger
A limited material palette is one of the most reliable tools in small-space interior design. Choose one wood tone, one stone or stone-look surface, and one dominant wall color, then repeat those three elements across zones. Repetition creates visual continuity; continuity makes a space read as larger than it is.
Light palettes (warm whites, soft greiges, pale oak) reflect more light and reduce visual weight. That does not mean the space must feel sterile. Introduce depth through texture: a linen sofa, a jute rug, a matte plaster-finish wall. Targeted accents in a single color, used in cushions, a vase, and a lamp shade, add personality without fragmenting the palette.
For floors, luxury vinyl plank (LVP) over acoustic underlayment is a practical choice for condos because it satisfies most building acoustic requirements, installs without wet trades, and comes in wide-plank formats that reduce the number of seams and make the floor read as larger. Engineered stone on a feature wall or built-in shelf adds a material moment without the weight or cost of full-room stone.
Realistic budget ranges and timeline differences for a condo living area update
The scope of work determines both cost and schedule. Here is a practical framework:
Scope | Typical Cost Range (USD) | Lead Time |
Refresh (paint, decor, furniture swap) | $2,000–$8,000 | 2–4 weeks |
Custom built-in carpentry | $8,000–$25,000+ | 6–12 weeks |
Full renovation (flooring, lighting, carpentry) | $25,000+ | 3–6 months |
Key considerations before you commit:
HOA or building management approval is required for any work involving drilling into structural elements, modifying electrical circuits, or changing flooring in units above ground level.
Permit timing for structural or electrical work in most U.S. jurisdictions adds two to six weeks to the schedule before work can begin.
Custom carpentry lead times (four to eight weeks for production, plus installation) mean you should finalize designs before ordering furniture, not after.
For a deeper look at sequencing a larger renovation, new home interior design planning covers the full project timeline in detail.
Moodboard prompts and before/after micro-case studies you can copy
Elle Decor’s open-concept portfolio demonstrates consistently that a clear palette and a single focal point prevent decorative drift in open-plan spaces. Three moodboard templates to start from:
Light coastal: White oak floors, linen sofa in warm white, jute rug, rattan accent chair, matte white walls, brass hardware, one large piece of abstract art in soft blues and sand. Focal point: the view or the art.
Modern warm: Smoked oak LVP, deep charcoal or forest green sofa, wool rug in terracotta and cream, walnut shelving, warm-white recessed lighting with a statement pendant, matte black fixtures. Focal point: the built-in shelving wall.
Sculptural neutral: Concrete-look LVP, oatmeal bouclé sofa, stone-look feature wall panel, arc floor lamp in brushed nickel, minimal accessories in white and natural wood. Focal point: the statement lamp or a single large-format photograph.
Before/after prompts to copy:
Before: Small rug that floats under the coffee table only, overhead light only, sofa pushed against the wall. After: Rug sized so all front legs sit on it, arc lamp added beside sofa, sofa pulled 12 inches from the wall to create a back-of-sofa console moment.
Before: TV on a low media unit, no shelving, accessories scattered. After: Floor-to-ceiling built-in flanking the TV, accessories edited to three grouped objects per shelf, accent lighting added inside the upper cabinets.
Designer perspective and Monarch carpenters’ practical carpentry fixes for condos
Monarch carpenters operates as a design-build studio, meaning the designers and carpenters work from the same brief, in the same conversation. That structure removes the gap between what a designer specifies and what a carpenter can actually build, which is where most cost overruns originate on condo projects.
For condos specifically, Monarch carpenters uses floating panel systems that avoid deep anchors into post-tension slabs, a structural constraint common in high-rise buildings. Built-in modules are sized during the design phase to fit the service elevator, so there are no surprises on installation day. This is not a minor detail: a built-in that cannot be delivered in sections is a built-in that cannot be installed at all.

Monarch carpenters’ clients consistently highlight two things in their feedback: the quality of the finished carpentry and the modest cost relative to what was delivered. That combination comes directly from the in-house model, where design fees and production costs are managed under one roof rather than marked up across multiple contractors.
Pro Tip: Ask your carpenter to mock up the built-in’s profile in cardboard before production begins. A full-scale cardboard template costs almost nothing and lets you confirm height, depth, and proportion in the actual room before a single piece of timber is cut.
Key Takeaways
A condo living area that feels spacious and stylish requires correct furniture scale, deliberate zoning tools, and layered lighting working together from the first measurement to the final accessory.
Point | Details |
Measure before you shop | Confirm usable wall length, elevator width, and corridor clearance before ordering any furniture. |
Zone without walls | Use a correctly sized rug (all front legs on it), distinct lighting per zone, and furniture orientation to define spaces. |
Layer three light types | Ambient, task, and accent lighting together define zones and expand perceived space more than any single fixture. |
Budget by scope | A refresh runs $2,000–$8,000; custom built-ins $8,000–$25,000+; full renovation $25,000+. |
Monarch carpenters | Monarch’s in-house design-build model delivers bespoke carpentry sized for elevator delivery at modest cost, with strong client satisfaction. |
What professionals actually prioritize in condo living area design
Most design guides focus on what to buy. Professionals focus on what to remove and where to stand.
The first thing a trained designer does in a condo living area is stand at the front door and identify the dominant sightline. That sightline is the room’s spine. Every furniture placement, every lighting decision, and every storage solution either supports that spine or fights it. Fighting it is why so many condo living areas feel busy and unresolved despite containing perfectly good furniture.
The second priority is circulation, not aesthetics. A room that looks beautiful in a photograph but requires you to turn sideways to reach the balcony is a failed design. Clearances are not optional niceties; they are the difference between a room you use freely and one you navigate carefully.
The trade-off designers make most often is between storage volume and visual weight. A floor-to-ceiling built-in holds more than any freestanding unit, but it also commits the wall permanently. The honest answer is that custom carpentry is worth the investment when the layout is settled and the client plans to stay. For someone who moves every two to three years, modular furniture that can be reconfigured or sold is the smarter call. Neither answer is wrong; the mistake is choosing one without thinking through the other.
Monarch carpenters brings bespoke design-build to your condo living area
Most condo owners face the same problem: they want a living area that looks considered and custom, but the quotes they receive from separate designers and contractors do not match their budget or their timeline.

Monarch carpenters resolves that gap directly. As a Singapore-based design-build studio with an in-house team of designers and carpenters, Monarch manages the full process from initial concept through production and installation under one contract. There is no markup between design and build, no miscommunication between a designer’s specification and a carpenter’s execution, and no separate project management fee. The result is bespoke carpentry and a cohesive living area design at a cost that clients consistently describe as fair for the quality delivered.
The process starts with a free consultation, followed by a design fee that covers drawings, material selections, and a production brief. Built-in modules are engineered to fit your building’s elevator and delivery route before production begins. To view completed projects or request a quote, visit Monarch carpenters.
Useful sources and further reading
FAQ
What is the most important first step in condo living area design?
Measure the usable wall length, elevator interior, and corridor width before purchasing any furniture. The sofa must fit both the room and the delivery route.
How large should a rug be in a condo living area?
The rug should be large enough that all front legs of every seating piece sit on it. A rug that only sits under the coffee table is too small and visually fragments the zone.
Can I zone an open-plan condo without building walls?
Yes. Area rugs, distinct lighting fixtures per zone, and deliberate furniture orientation define living, dining, and work areas clearly without any structural work, as the broken-plan approach demonstrates.
What does a condo living area refresh typically cost?
A refresh covering paint, new furniture, and updated decor typically runs $2,000–$8,000. Custom built-in carpentry adds $8,000–$25,000 or more depending on scope and materials.
How does Monarch carpenters keep costs modest on custom carpentry?
Monarch carpenters uses an in-house design-build model where designers and carpenters work under one roof, eliminating the markup and miscommunication that occur when design and production are contracted separately.
Recommended
Comments