
What Is a Rain Shower Design, and Is It Right for Your Bathroom?
- Monarch

- 2 days ago
- 14 min read
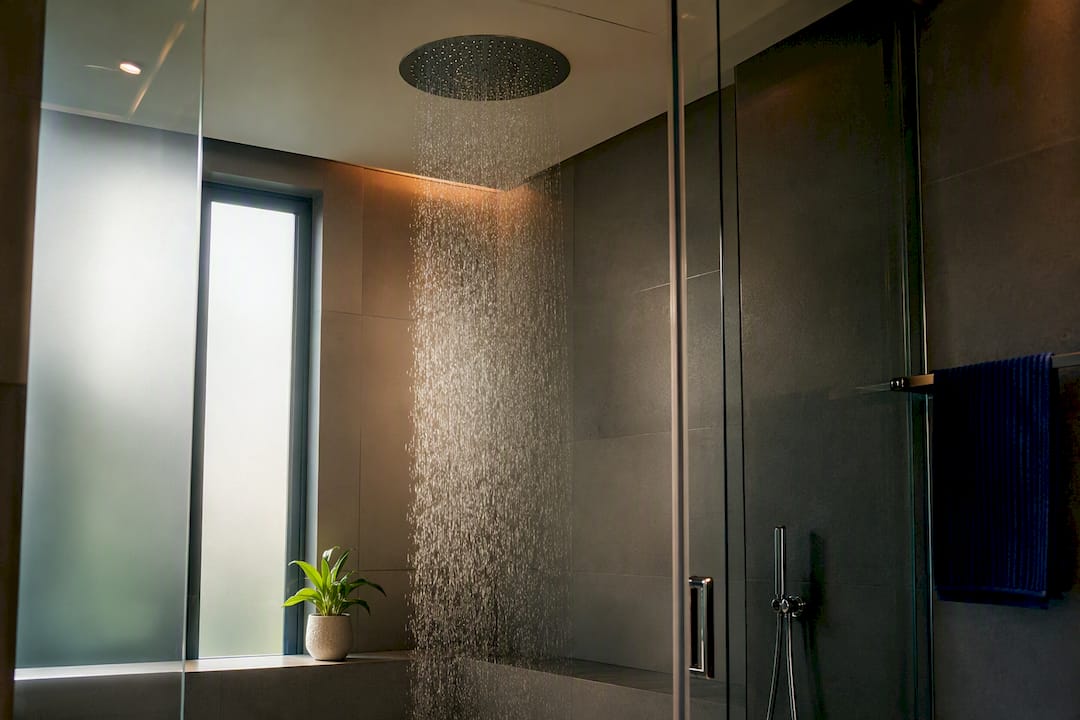
A rain shower design is a bathroom setup built around a large overhead showerhead that releases water straight down over a wide area, recreating the sensation of standing in warm rain. The defining features are simple: overhead mounting, a wide diameter (typically 8 to 16 inches), and a softer, broader spray pattern than a standard handheld or fixed showerhead delivers. This is a strong upgrade for homeowners with solid water pressure, a shower enclosure roomy enough to handle the coverage, and a preference for a slower, spa-style rinse over a quick, targeted blast.
Mount type: ceiling mount or high wall-arm
Diameter: commonly 8 to 16 inches
Spray feel: wide, gentle, full-body coverage rather than a concentrated stream
Flow rate: most models sit in the 1.75 to 2.5 GPM range
Quick Stat: A 10 to 12 inch rainfall head at adequate pressure gives shoulder-to-shoulder coverage for most adults, and a high wall-arm install delivers 85 to 90% of the true ceiling-mount experience for a fraction of the labor cost.
Table of Contents
What Is a Rain Shower Design, Exactly?
The term covers a lot of ground, so let’s get specific. A rain shower design refers to any shower system where the primary head sits directly overhead, releasing water in a wide, even sheet instead of a narrow stream aimed at your torso. Designers describe this using a specific vocabulary: “rain” or “rainfall” head, “ceiling mount” versus “wall-arm,” and “recessed slot” for the more architectural, minimalist versions built into the ceiling itself.
Shapes and sizes vary more than most homeowners expect. Round heads remain the most common, but square and rectangular panels have become standard in modern renovations, especially in larger walk-in showers where a linear slot fits the ceiling geometry better than a circle. Diameters typically range from 8 inches on the compact end to 16 inches or larger for a true architectural statement.
Material choice affects both looks and lifespan:
Stainless steel: highly corrosion-resistant, holds up well against hard water
Solid brass: heavier, often used under a chrome or nickel finish, resists warping over time
Chrome-plated finishes: budget-friendly, easy to clean, but can show water spots faster
Brushed nickel: hides fingerprints and mineral spots better than polished chrome
Familiar manufacturer names like Kohler, Delta, and Moen all produce rainfall heads across these material and size ranges, giving you a useful benchmark when comparing specs at a showroom or online. None of them is the “right” answer on its own. What matters is matching the diameter, finish, and mounting style to your specific bathroom, which is where a material selection guide becomes genuinely useful before you commit to a fixture.
How Does a Rain Shower Head Actually Work?
A rain head works by spreading water across a wide face plate instead of forcing it through a single small nozzle, so it falls vertically over your entire body rather than hitting one spot with force. That’s the whole mechanical idea: trade concentrated pressure for even distribution.
A complete rainfall system typically includes:
The shower head itself, mounted on a ceiling stub-out or an extended wall arm
A pressure-balancing or thermostatic valve to keep water temperature stable
Supply piping routed to the mounting point
Often a diverter and a secondary handheld unit for rinsing
Sometimes an integrated body-spray package for a full spa build-out
Nozzle engineering is where the real differences show up between a $40 head and a $300 one. Cheaper heads rely purely on gravity and a wide face. Better-engineered heads use micro-nozzles or internal pressure-boost chambers that narrow the water path just enough to maintain force without sacrificing the wide spray pattern. That’s the difference between a rain head that feels like a light drizzle and one that still rinses shampoo out efficiently. Before buying, confirm the head is compatible with your existing valve; some thermostatic and pressure-balancing valves have flow limits that clash with certain rainfall models.
Ceiling, Wall Arm, or Recessed Slot: Which Placement Fits Your Bathroom?
Three placement options dominate the market, and each comes with a very different cost and disruption level.
Ceiling-mounted heads sit directly overhead, plumbed through the ceiling itself. This gives you the most authentic vertical fall, water dropping straight down rather than arcing slightly from an angled arm. It’s also the most invasive option, usually requiring a plumber to route supply lines through the ceiling cavity and a carpenter or drywall contractor to patch and finish the area afterward.
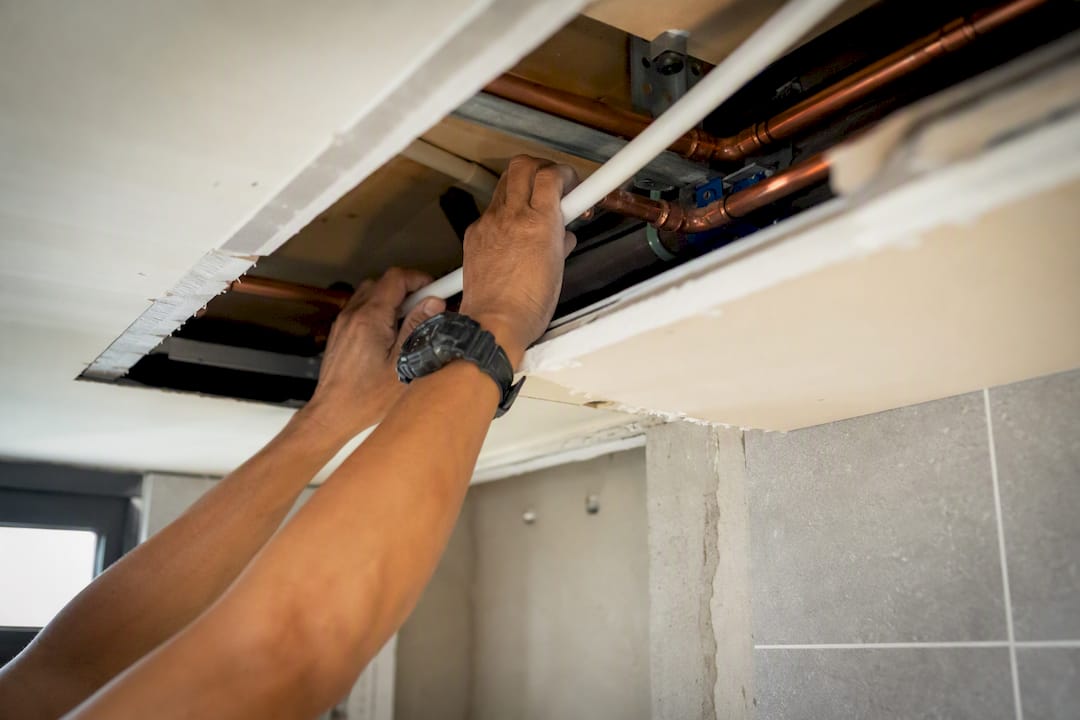
High wall-arm mounts extend a curved or straight arm from the existing wall plumbing up and over the shower area, angling the head down. This approximates the ceiling-mount experience closely, delivering 85 to 90% of the sensation at a significantly lower installation cost since it typically reuses your existing 1/2 inch shower arm connection.
Recessed or linear slot heads are built into a dropped ceiling or bulkhead, creating an almost invisible fixture line. These look striking in modern and minimalist bathrooms but require the most planning, since they demand a false ceiling or soffit structure to hide the plumbing and housing.
Ceiling mount: most authentic feel, highest cost, needs ceiling access
Wall arm: near-identical feel, lowest cost, minimal plumbing disruption
Recessed slot: cleanest look, highest design complexity, best for new builds or full gut renovations
Pro Tip: If your budget or ceiling structure rules out a true overhead install, pair a high wall-arm rain head with a handheld on a slide bar. You get the spa-like coverage for standing and relaxing, plus a targeted stream for washing hair or rinsing quickly, without touching the ceiling at all.
How Big Should Your Rain Shower Head Be?
Size the head to your enclosure, not to what looks impressive in a showroom display. A rule of thumb that holds up across most bathroom sizes: 6 to 8 inches for compact or secondary showers, 8 to 12 inches for a standard master bathroom, and 12 to 16 inches or larger for a spa-style or steam shower build.
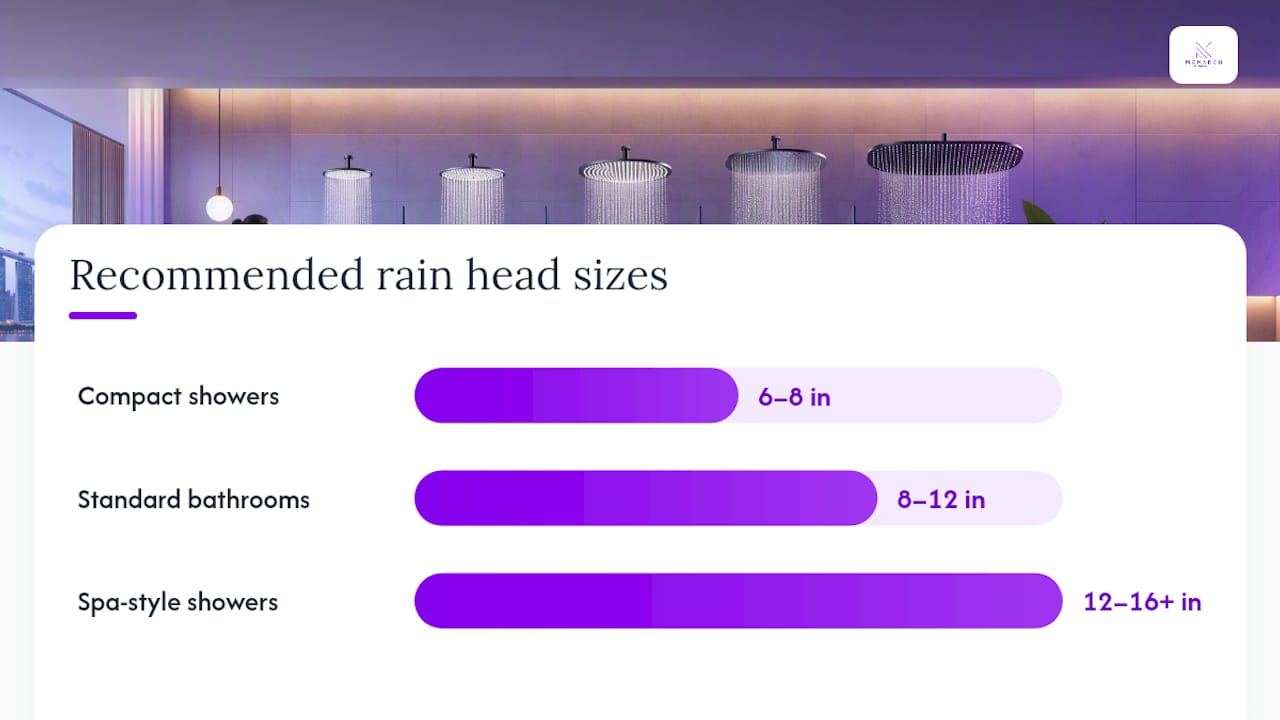
Diameter changes more than the visual footprint. A wider face plate spreads the same water volume over more surface area, which softens the perceived pressure but extends coverage shoulder to shoulder. A narrower head concentrates that same flow, feeling firmer but covering less of your body at once.
A few concrete examples make this easier to picture:
8 inches: fits tight stalls, secondary bathrooms, or households prioritizing water efficiency
10 to 12 inches: the sweet spot for most primary bathroom remodels
14 to 16+ inches: designer statement pieces, best in larger enclosures with strong supply pressure
Quick Stat: Enclosure width matters as much as head size. Mounting a 14 inch head in a 32 inch stall wastes most of its coverage on the walls instead of your body, so match diameter to actual usable shower width, not just the ceiling or wall space available. If you’re working with a tight footprint, a small-space design approach helps you avoid oversizing a fixture your layout can’t support.
What Water Pressure and Flow Rate Do You Need?
A rain head doesn’t increase your home’s water pressure. It changes how that pressure feels by spreading the same flow across a wider area, which is why homes with marginal pressure notice rain heads feeling weaker than their old showerhead, even when nothing else changed. A system pressure around 45 PSI or higher generally delivers a satisfying experience; below that, even a well-engineered head can feel underwhelming.
Flow rate is the other half of the equation. Most rain showerheads on the market fall in the 1.75 to 2.5 GPM range. If you live somewhere with water-use restrictions, look for models rated at 1.8 GPM or lower, or choose a pressure-boosted head designed to feel stronger without increasing actual water use.
Before buying, check these specs against your home’s plumbing:
GPM rating of the head itself
Minimum PSI the manufacturer recommends for full performance
Whether the head includes pressure-boost or micro-nozzle technology
Compatibility with your existing valve type (standard, pressure-balancing, or thermostatic)
If your home runs on the low end for pressure, don’t rule out rain showers entirely. Pressure-boost engineering and micro-nozzle designs are specifically built to solve this problem, and a whole-house or point-of-use booster pump is a legitimate retrofit option if the pressure issue extends beyond just the shower.
Rain Shower Pros and Cons: Who Actually Benefits?
The appeal is easy to understand once you’ve stood under a properly sized, well-pressured rain head. The trade-offs are just as real, and they matter more in some bathrooms than others.
What works in its favor:
Full, even coverage that feels closer to standing in warm rain than showering
A calming, restorative quality; research on natural rain sounds shows they can increase alpha-wave brain activity and lower stress
A premium, architectural look that reads as a genuine upgrade to buyers and guests alike
High wall-arm versions are often an easy retrofit onto existing plumbing
Where it falls short:
Perceived pressure drops compared to a standard showerhead at the same GPM
True ceiling installs require real plumbing and ceiling work, raising both cost and disruption
Splash and overspray can be a problem in narrow or poorly enclosed stalls
Wide face plates collect limescale faster in hard-water areas and need more frequent cleaning
If you’re renovating a primary bathroom and lean toward long, relaxing showers, a rain head is a strong fit. If your household is mostly quick-rinse showerers working with a compact stall and modest water pressure, weigh the cons more heavily, or plan for a hybrid setup instead. Whatever you choose, check your local plumbing code for maximum flow-rate limits before finalizing a fixture; some jurisdictions cap residential shower GPM for water conservation.
DIY or Hire a Pro? What Installation Actually Involves
A wall-arm swap is often a same-day DIY project or a quick call-out for a plumber. A true ceiling-mounted rain head almost always needs a licensed plumber, and frequently a carpenter or drywall contractor as well, since you’re opening and repairing a finished ceiling.
The high-level install sequence looks like this:
Assess your existing plumbing access and confirm whether supply lines can reach the new mounting point
Choose your head and confirm it matches your valve type
Reroute or extend the supply line to the ceiling or wall-arm position
Mount the head and connect the arm or ceiling stub
Test the connection for leaks, then finish the ceiling, patch drywall, and set trim
Call a professional rather than attempting it yourself when any of the following apply:
The ceiling cavity has no existing access point for plumbing
You need to reroute supply lines through joists or drop a section of ceiling
You’re upgrading to a thermostatic valve, which involves more complex calibration
The shower needs waterproofing or steam-proofing changes beyond the fixture swap
Timeline-wise, budget half a day for a simple wall-arm swap. A pro-installed ceiling mount, including trim work and patching, typically runs one to three days depending on how much of the ceiling needs to be opened and refinished. Before hiring anyone, ask about their specific experience with rainfall systems, request references from recent bathroom projects, and confirm licensing and insurance. This is also a good moment to think through the broader renovation sequence so the shower work doesn’t collide with other trades on-site.
How Much Does a Rain Shower Design Cost?
Fixture prices span a wide range depending on size, material, and brand. Budget models start around $40 to $80, mid-range fixtures with better nozzle engineering and finishes run $100 to $300, and premium architectural heads with integrated thermostatic controls or larger diameters can reach $500 or more.
Installation labor is where costs diverge sharply based on placement:
Wall-arm swap: minimal labor, often reusing existing plumbing, the fastest and cheapest path to a rain shower
Ceiling-mounted install: requires plumbing rerouting, ceiling access, and finish repair, which adds both trade time and material cost
Valve upgrades: switching to a thermostatic valve adds labor and parts cost on top of the head itself
Tile and waterproofing repair: any time you open a finished wall or ceiling, expect additional cost to restore the surface properly
Quick Stat: Choosing a high wall-arm installation over a ceiling mount is one of the most reliable ways to cut total project cost while still getting most of the rainfall experience, since it avoids the plumbing reroute and ceiling patch work that drive up ceiling-mount pricing.
What typically pushes a project toward the higher end of the range: larger diameter heads (14 inches and up), designer finishes like matte black or brushed brass, and bundling in a thermostatic valve or body-spray system rather than a single fixture. A kitchen renovation planning approach applies just as well here: get quotes that separate fixture cost from labor so you know exactly where your money is going.
How Do You Choose the Right Rain Shower for Your Home?
Work through this checklist before you buy anything or sign off on a design:
Measure your enclosure’s usable width and height to figure out realistic head diameter
Locate your existing supply lines and ceiling access points
Check your home’s static water pressure (a simple gauge from a hardware store will do)
Confirm your valve type and whether it’s compatible with the head you want
Assess ceiling space if you’re considering a true overhead mount
When talking to installers or vendors, ask direct questions:
What GPM will this head deliver at my home’s actual pressure?
What’s the warranty, and does it cover anti-scale components specifically?
What’s the lead time on trim and finish parts if they need to be special-ordered?
How serviceable is this fixture if a nozzle clogs or a seal fails down the line?
Watch for red flags before committing. A vendor who can’t give you a GPM spec at typical residential pressure, a head with no removable or accessible nozzles for cleaning, or an installer who pushes a ceiling mount without first checking your actual plumbing access are all signs to slow down and get a second opinion. If you’re unsure whether a single rain head will meet your household’s needs, consider pairing it with a handheld or secondary outlet. It preserves everyday function while still giving you the rainfall experience for longer, relaxing showers, and it’s a much easier retrofit to add later than to remove.
How Do You Clean and Maintain a Rain Shower Head?
Limescale is the enemy of every rain head, especially in hard-water regions, and the wide face plate gives mineral buildup more surface area to cling to than a standard head.
For stainless steel and chrome finishes, soak a plastic bag filled with white vinegar around the head for 30 to 60 minutes, then scrub gently with a soft brush to clear nozzle openings. Brass fixtures need a gentler approach: a diluted vinegar solution and a microfiber cloth, avoiding abrasive scrubbing that can wear through plating over time.
A simple maintenance schedule keeps performance consistent:
Monthly: quick rinse and wipe-down to prevent surface buildup
Quarterly (or monthly in hard-water areas): full descaling soak
Annually: inspect seals and connections at the arm for early signs of leaks
When shopping, favor heads with removable nozzles you can access individually, anti-scale coatings baked into the finish, and fittings simple enough to service without specialty tools.
Pro Tip: If you notice uneven spray patterns, it’s almost always mineral buildup in specific nozzles rather than a defective head. A toothpick or soft wire brush cleared through each opening after a vinegar soak solves this in minutes, no replacement needed. Minor leaks at the arm connection are usually a worn washer or loose fitting, an easy fix with a wrench and a new O-ring before you assume the whole unit needs replacing.
Waterfall Heads, Handhelds, and Other Alternatives Worth Considering
Rainfall isn’t the only overhead option, and it isn’t always the right one. Waterfall heads release water in a sheet-like cascade rather than the vertical spray of rainfall, creating a dramatic visual effect but less even body coverage. Handheld showers trade the immersive feel for targeted control, which matters more than people expect for households with mobility needs or anyone who prefers a focused rinse over ambient coverage.
Hybrid setups solve most of the trade-offs:
Overhead rain head plus a handheld on a slide bar for accessible, targeted rinsing
Rain head combined with body sprays for a full spa-style system
Pressure-boosted rainfall heads specifically for homes with low incoming pressure
Choose a hybrid when your shower is small, your household includes members with different rinsing needs, or your home’s pressure can’t fully support a standalone rain head. And if space or budget genuinely won’t stretch to a rainfall system, a quality standard showerhead with a good handheld combo remains a perfectly reasonable choice, particularly in secondary bathrooms where the spa experience matters less than daily function.
Practical Design and Carpentry Tips for a Seamless Rain Shower
Getting the plumbing right is only half the job. The finish work around a rain head, especially a ceiling-mounted one, is where a project either looks custom-built or looks like an afterthought bolted onto the ceiling.

Before any tile goes up, plan for clearance around the head, a discreet access panel for future servicing, and trim details that match your cabinetry finishes elsewhere in the bathroom. Skipping the access panel is the single most common regret we hear about after the fact, since it turns a five-minute nozzle repair into a ceiling demolition job.
Our carpentry team approaches ceiling access, trim patching, and finish matching as one continuous process rather than separate trades working in isolation, which is part of why Monarch Carpentry Design Studio has built a track record of strong client reviews on projects that stayed within a modest, clearly scoped budget.
A few cost-saving tactics we recommend to clients weighing a rain shower upgrade:
Choose a high wall-arm install to simulate the overhead feel without opening the ceiling
Pick a standard, reliable valve and put the extra budget toward a premium head instead
Stage the carpentry patch work so finish labor happens once, not in multiple disruptive passes
Planning the access panel and trim sequence before the plumber ever opens the ceiling is what separates a rain shower that looks integrated from one that looks patched together. It’s a small planning step that saves real money in finish labor later.
Is a Rain Shower Design Actually Worth the Upgrade?
The conventional advice treats rain showers as a binary choice: full ceiling-mount luxury or skip it entirely. That framing misses the more useful middle path. A high wall-arm install, paired with a well-chosen head and a competent valve, delivers most of the experience homeowners actually want, and it does so without the plumbing disruption that scares people away from the category altogether.
What’s overrated in most buying guides is diameter for its own sake. A 16 inch designer head in an 8 inch coverage need is wasted money and wasted water pressure spread too thin. What’s underrated is the finish work: ceiling access, trim matching, and staged carpentry are what make a rain shower look intentional rather than retrofitted, and that’s precisely where most DIY projects and budget contractors cut corners.
If you take one thing from this guide, prioritize matching head size and mount type to your actual bathroom and pressure specs before you fall in love with a finish. The aesthetic decisions are reversible. A poorly matched plumbing decision is not.
Sources
FAQ
Are Rain Showers Better Than Regular Showers?
They’re better for relaxation and full-body coverage, but not necessarily for quick, targeted rinsing. Homeowners who shower slowly and prioritize a spa-like feel tend to prefer rain heads, while those who want a fast, forceful rinse often stick with a standard head or add a handheld alongside it.
How Much Does a Rain Shower Cost?
Fixture prices range from roughly $40 for budget models to $500 or more for premium architectural heads, with mid-range options typically landing between $100 and $300. Installation cost depends heavily on placement, since a wall-arm swap costs far less than a ceiling-mounted install requiring plumbing rerouting and ceiling repair.
What Are the Disadvantages of a Rain Shower Head?
The main drawbacks are lower perceived water pressure, higher installation cost for true ceiling mounts, potential splash issues in small enclosures, and faster limescale buildup on the wide face plate in hard-water areas.
How Do I Make My Shower a Rain Shower?
The simplest route is installing a high wall-arm rain head, which typically screws onto your existing 1/2 inch shower arm connection with minimal plumbing work. For a true overhead ceiling mount, you’ll need a licensed plumber to route supply lines and likely a carpenter to patch and finish the ceiling afterward.
Recommended
Comments